The quick answer: calculate the missing pixels first
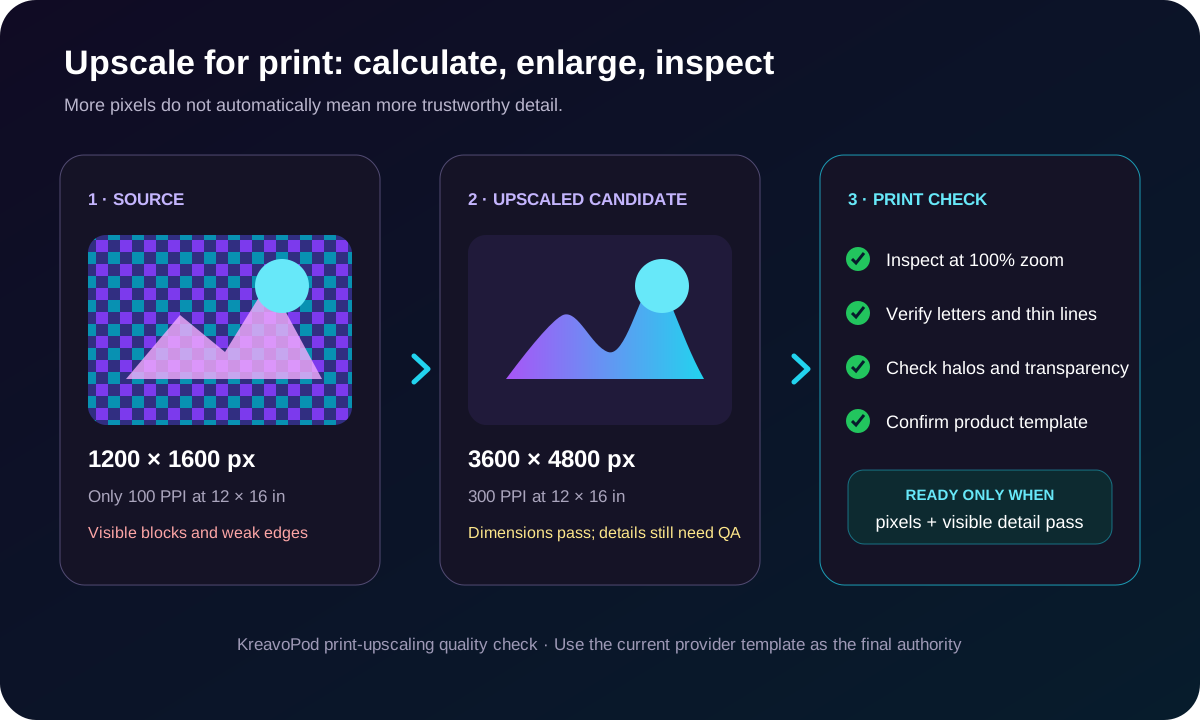
To increase image resolution for printing, begin with the final print dimensions rather than a random 2× or 4× setting. Multiply the intended width and height in inches by the provider's target pixels per inch. A 12 × 16 inch print at 300 PPI needs 3600 × 4800 pixels. If the source already meets or exceeds that size, it usually does not need upscaling.
If the source is smaller, compare the gap with the quality of the artwork. A clean 1800 × 2400 illustration is a sensible 2× candidate for that 12 × 16 inch target. A noisy 600 × 800 screenshot is not: increasing its dimensions would also enlarge compression, jagged edges and unreadable detail.
| Intended print size | Pixels at 300 PPI | Pixels at 150 PPI |
|---|---|---|
| 4 × 4 in | 1200 × 1200 px | 600 × 600 px |
| 10 × 12 in | 3000 × 3600 px | 1500 × 1800 px |
| 12 × 16 in | 3600 × 4800 px | 1800 × 2400 px |
| 15 × 18 in | 4500 × 5400 px | 2250 × 2700 px |
| 18 × 24 in | 5400 × 7200 px | 2700 × 3600 px |
Image resolution, DPI and resampling are different things
For raster artwork, resolution usually describes the pixel dimensions: for example, 1800 × 2400 pixels. PPI describes how densely those pixels are assigned to an inch of the intended print. DPI technically describes printer dots, although print platforms often use DPI when they report the effective pixel density of an uploaded design.
Changing only the resolution metadata redistributes the same pixels across a different physical size. Resampling actually changes the pixel count. Upscaling is a form of resampling that adds predicted pixels, so the file becomes larger but the source information does not magically become more accurate.
- Metadata change: pixel dimensions stay the same; intended inches or PPI change.
- Upscaling or upsampling: new pixels are generated between existing pixels.
- Vector scaling: mathematical paths are redrawn at the requested size instead of interpolating a pixel grid.
- Print quality: depends on the source detail, effective density at the intended size and the production method.
Practical note: Do not judge a file by the DPI field alone. Reopen it and verify its pixel dimensions, intended print size and visible detail.
What AI upscaling can fix — and what it cannot
A good upscaler can make a clean raster source more usable by predicting smoother curves, separating nearby edges and reducing some blockiness. This is useful when an illustration or generated image is structurally sound but just below the required pixel dimensions.
Upscaling cannot know the exact small letters, facial features, line endings or texture that were missing from the source. It may invent plausible detail instead. That is acceptable only when the invented result still matches the intended artwork and survives inspection. Production-critical spelling, trademarks, signatures and fine line art should never be trusted to automatic reconstruction.
- Good candidate: clean illustration, strong silhouettes, controlled texture and a modest enlargement gap.
- Risky candidate: tiny lettering, heavy JPEG blocks, severe blur, screenshots or a source that is already visibly broken.
- Better to regenerate: AI art with malformed objects, damaged faces or missing structural detail.
- Better to vectorize: flat logos, simple lettering and geometric shapes with clean boundaries.
Use this resolution decision before you enlarge anything
The safest workflow has four decisions: define the output, calculate the required pixels, inspect the source and choose the least destructive action. This prevents a common mistake—running every file through a 4× upscaler even when the source already has enough pixels or is too damaged to benefit.
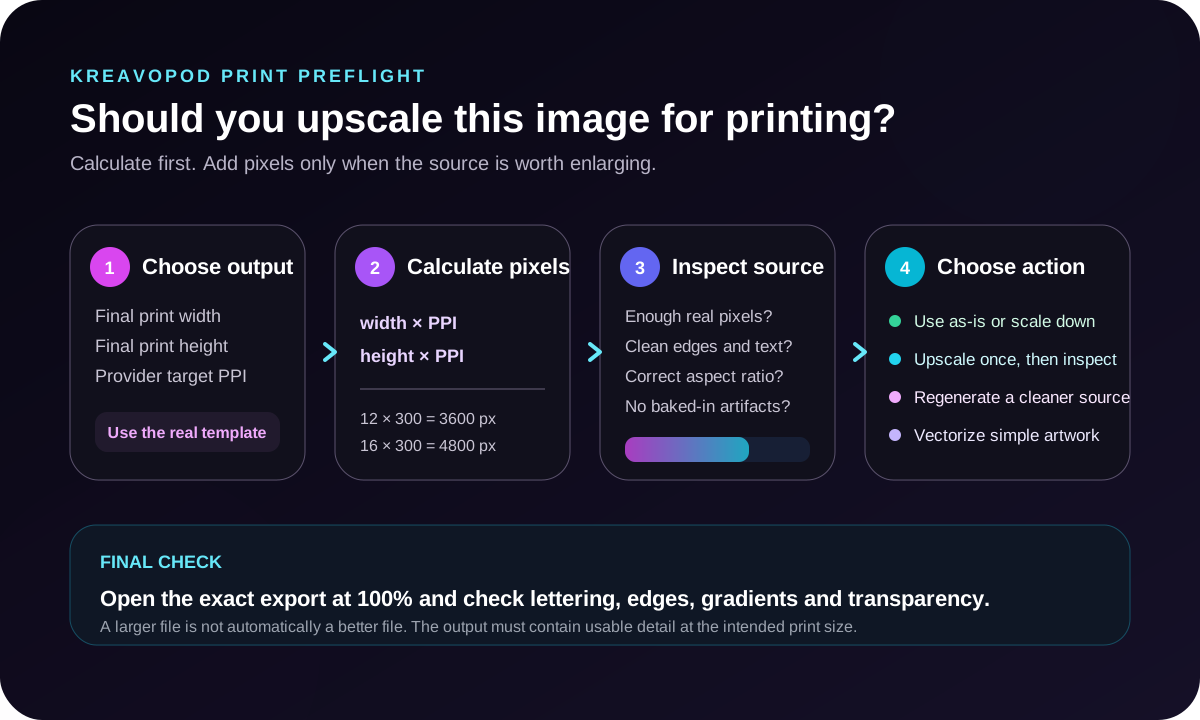
| Source condition | Best next step | Reason |
|---|---|---|
| Already meets target pixels | Use as-is or scale down | Extra resampling adds risk without solving a size problem |
| Clean raster, about 2× too small | Upscale once | A moderate enlargement can create a usable production candidate |
| Tiny, blurry or artifact-heavy raster | Regenerate or rebuild | The source does not contain reliable structure to preserve |
| Simple logo, shapes or lettering | Use a true vector master | Paths scale cleanly and keep edges controllable |
| Wrong aspect ratio for the product | Recompose or crop deliberately | Stretching distorts the artwork and upscaling cannot fix composition |
How to upscale an image for printing without losing quality, step by step
To upscale an image for printing without losing quality, first select the exact product, print location and current provider template. Record the required pixel dimensions, accepted format, color guidance and file-size limit. Then open the highest-quality source available—not a marketplace thumbnail, compressed message attachment or screenshot.
Inspect the source at 100%. Check lettering, faces, outlines, gradients, texture, compression and transparent edges. Calculate its effective print density by dividing the source pixels by the intended inches. If the gap is reasonable, run one controlled upscale that preserves the aspect ratio. Do not stretch width and height independently to force the file into a template.
After upscaling, reopen the exact output. Compare it beside the source, not only at a fit-to-screen zoom. Inspect the features that matter in print: curves, diagonals, small counters inside letters, thin outlines, texture transitions and semi-transparent edge pixels. Finally, calculate the new effective density and export a product-specific copy from the cleaned master.
- Choose product, print location, intended inches and provider target.
- Open the best source and preserve an untouched master copy.
- Calculate the exact target pixels before choosing an enlargement factor.
- Clean obvious artifacts and decide whether background removal should happen before enlargement.
- Upscale once while preserving the original aspect ratio.
- Inspect the output at 100% on light and dark backgrounds.
- Verify the final pixel dimensions, transparency, format and file-size limit.
Worked POD examples: when 2× works and when 4× is not enough
Example one: a clean 1800 × 2400 px portrait illustration is intended for a 12 × 16 inch print. It provides 150 PPI at that size. A 2× upscale produces 3600 × 4800 px, which corresponds to 300 PPI. The numbers work, but the output still needs visual inspection because doubling dimensions does not guarantee clean reconstructed detail.
Example two: a 1024 × 1024 px square image is intended for a 15 × 18 inch portrait print. The aspect ratios do not match, and the target at 300 PPI is 4500 × 5400 px. A 4× result would be 4096 × 4096 px: still the wrong shape and short on height. The correct action is to recompose or regenerate the artwork for the portrait canvas before any final enlargement.
Example three: a flat 900 × 900 px logo contains four solid colors and clean lettering. Instead of asking an AI upscaler to guess the letter edges, rebuild or trace the logo as true vector paths, inspect the paths, and export the accepted production format at the required size.
Protect transparent edges, text and fine line art
Transparent artwork can hide halos that become more visible after enlargement. Preview the source on both white and dark backgrounds. If the background remover left a light fringe, clean that fringe before it is multiplied into a larger edge. When the original edge is clean but very small, compare background removal before and after upscaling and keep the version with the most natural contour.
Keep editable text and simple line art separate whenever possible. Scale those elements as vector layers, then combine them with the enlarged raster artwork. If the source already contains flattened text, verify every character after upscaling; automatic reconstruction can subtly change spacing, punctuation and letterforms.
What to do when an upscaled image looks artificial
If the output looks waxy, oversharpened or full of invented texture, reduce the enlargement factor and compare again. A cleaner 2× result is often more useful than an aggressive 4× result. Avoid repeatedly upscaling an already upscaled output because every pass can reinforce invented edges and noise patterns.
Return to the best source and decide whether the problem is size or content. Regenerate damaged AI art, redraw lettering, vectorize simple shapes, or choose a smaller print. The goal is not the largest possible file; it is the smallest intervention that creates a believable, production-ready result.
- Compare 2× and 4× at the same intended print size.
- Reduce sharpening if thin lines develop bright or dark halos.
- Restore controlled texture only from a trustworthy master, not from compression noise.
- Regenerate details that are structurally wrong instead of polishing them indefinitely.
- Choose a smaller print when the source cannot support the requested enlargement.
Final high-resolution print file checklist
Save the editable master separately, then reopen the exact product-specific export. A successful upload message only confirms that the platform accepted the file; it does not prove that every reconstructed edge, letter or texture will print well.
- Correct product, print location and current provider template
- Correct pixel width, height and aspect ratio
- Effective density calculated at the actual intended inches
- Lettering, faces, curves and thin lines inspected at 100%
- No JPEG blocks, ringing, oversmoothing or invented artifacts
- Transparency checked on light and dark backgrounds
- Accepted file format, color profile and file-size limit
- Exact final export reopened before upload
Practical note: Provider requirements differ by product and can change. Treat the current product template as the final authority, even when a general guide recommends 300 PPI.
Frequently asked questions
Does changing DPI increase image resolution?
Not by itself. Changing the DPI or PPI metadata without resampling keeps the same pixel dimensions. To create a larger raster file, pixels must be added through upscaling, regeneration or another resampling method.
How many pixels do I need for a 300 DPI print?
Multiply the intended width and height in inches by 300. A 12 × 16 inch print needs 3600 × 4800 pixels at 300 PPI. Follow the current provider template because some products accept or recommend a different effective density.
Can AI make a low-resolution image high resolution?
AI can generate additional pixels and may improve a clean source, but it predicts missing detail rather than recovering exact original information. Inspect lettering, edges, faces and texture before treating the result as print-ready.
Should I remove the background before or after upscaling?
Clean obvious background artifacts before enlargement so they are not amplified. For small complex edges, compare both orders and keep the version with the cleanest contour. Always verify the final transparency on light and dark backgrounds.
Can I upscale a 72 DPI image to 300 DPI?
Possibly, but the 72 DPI label alone is not enough to decide. Compare the actual pixel dimensions with the intended print inches. If the source is clean and the pixel gap is moderate, one upscale may create a usable candidate.
Is a bigger image file always better for printing?
No. A larger file can contain duplicated pixels, invented detail or stronger artifacts. Print quality depends on useful source detail, effective density at the intended size and a careful inspection of the exact export.
Upscale your image for print in KreavoPod
Enlarge a clean source, compare its print size, inspect transparent edges and continue into the connected POD workflow.
Open resource →